Zelf een virtuele scanner bouwen
Een virtuele scanner is een softwarematige oplossing die de functionaliteit van een fysieke documentscanner nabootst. Ontwikkelaars en testers kunnen hiermee scanbewerkingen simuleren zonder echte hardware nodig te hebben, waardoor het een essentieel hulpmiddel is voor testen en ontwikkelen. In deze tip maken we een virtueel scannerapparaat voor Linux met behulp van het SANE (Scanner Access Now Easy) framework. Aan het eind van deze handleiding heb je een volledig functionele virtuele scanner die aangepaste afbeeldingen kan laden.
De kant-en-klare virtuele test scanner van SANE
Het SANE framework bevat een kant-en-klare backend die ontworpen is voor testdoeleinden. Volg deze stappen om het te gebruiken:
- Start in de terminal met superuser-rechten een teksteditor om het configuratie dll.conf van SANE aan te passen:
dany@pindabook:~$
sudo nano /etc/sane.d/dll.conf - Verwijder het commentaarteken # van de regel
#test. M.a.w. de regel:#test
wordttest
- Sla de aanpassing op met Ctrl+o, gevolgt door Enter. Daarna verlaat je de nano editor met Ctrl+x.
- Voer de volgende opdracht uit om alle beschikbare scanners op te sommen.
Daarbij wordt afgetast op alle mogelijke scanners, ook netwerkscanners.
M.a.w. dit neemt wat tijd in beslag.
dany@pindabook:~$
scanimage -Ldevice `test:0' is a Noname frontend-tester virtual device device `test:1' is a Noname frontend-tester virtual device - Gebruik de volgende opdracht om een scan te simuleren en een zwarte afbeelding te genereren:
dany@pindabook:~$
scanimage -d test > test.pnmOutput format is not set, using pnm as a default.
Gwenview kan dit bestand niet openen, GIMP wel.
Om de extra mogelijkheden van de virtuele scanner te verkennen, kun je alle beschikbare opties bekijken met:
dany@pindabook:~$scanimage -d test --helpUsage: scanimage [OPTION]... Start image acquisition on a scanner device and write image data to standard output. Parameters are separated by a blank from single-character options (e.g. -d epson) and by a "=" from multi-character options (e.g. --device-name=epson). -d, --device-name=DEVICE use a given scanner device (e.g. hp:/dev/scanner) --format=pnm|tiff|png|jpeg|pdf file format of output file -i, --icc-profile=PROFILE include this ICC profile into TIFF file -L, --list-devices show available scanner devices -f, --formatted-device-list=FORMAT similar to -L, but the FORMAT of the output can be specified: %d (device name), %v (vendor), %m (model), %t (type), %i (index number), and %n (newline) -b, --batch[=FORMAT] working in batch mode, FORMAT is `out%d.pnm' `out%d.tif' `out%d.png' or `out%d.jpg' by default depending on --format This option is incompatible with --output-file. --batch-start=# page number to start naming files with --batch-count=# how many pages to scan in batch mode --batch-increment=# increase page number in filename by # --batch-double increment page number by two, same as --batch-increment=2 --batch-print print image filenames to stdout --batch-prompt ask for pressing a key before scanning a page --accept-md5-only only accept authorization requests using md5 -p, --progress print progress messages -o, --output-file=PATH save output to the given file instead of stdout. This option is incompatible with --batch. -n, --dont-scan only set options, don't actually scan -T, --test test backend thoroughly -A, --all-options list all available backend options -h, --help display this help message and exit -v, --verbose give even more status messages -B, --buffer-size=# change input buffer size (in kB, default 32) -V, --version print version information Output format is not set, using pnm as a default. Options specific to device `test': Scan Mode: --mode Gray|Color [Gray] Selects the scan mode (e.g., lineart, monochrome, or color). --depth 1|8|16 [8] Number of bits per sample, typical values are 1 for "line-art" and 8 for multibit scans. --hand-scanner[=(yes|no)] [no] Simulate a hand-scanner. Hand-scanners do not know the image height a priori. Instead, they return a height of -1. Setting this option allows one to test whether a frontend can handle this correctly. This option also enables a fixed width of 11 cm. --three-pass[=(yes|no)] [inactive] Simulate a three-pass scanner. In color mode, three frames are transmitted. --three-pass-order RGB|RBG|GBR|GRB|BRG|BGR [inactive] Set the order of frames in three-pass color mode. --resolution 1..1200dpi (in steps of 1) [50] Sets the resolution of the scanned image. --source Flatbed|Automatic Document Feeder [Flatbed] If Automatic Document Feeder is selected, the feeder will be 'empty' after 10 scans. Special Options: --test-picture Solid black|Solid white|Color pattern|Grid [Solid black] Select the kind of test picture. Available options: Solid black: fills the whole scan with black. Solid white: fills the whole scan with white. Color pattern: draws various color test patterns depending on the mode. Grid: draws a black/white grid with a width and height of 10 mm per square. --invert-endianess[=(yes|no)] [inactive] Exchange upper and lower byte of image data in 16 bit modes. This option can be used to test the 16 bit modes of frontends, e.g. if the frontend uses the correct endianness. --read-limit[=(yes|no)] [no] Limit the amount of data transferred with each call to sane_read(). --read-limit-size 1..65536 (in steps of 1) [inactive] The (maximum) amount of data transferred with each call to sane_read(). --read-delay[=(yes|no)] [no] Delay the transfer of data to the pipe. --read-delay-duration 1000..200000us (in steps of 1000) [inactive] How long to wait after transferring each buffer of data through the pipe. --read-return-value Default|SANE_STATUS_UNSUPPORTED|SANE_STATUS_CANCELLED|SANE_STATUS_DEVICE_BUSY|SANE_STATUS_INVAL|SANE_STATUS_EOF|SANE_STATUS_JAMMED|SANE_STATUS_NO_DOCS|SANE_STATUS_COVER_OPEN|SANE_STATUS_IO_ERROR|SANE_STATUS_NO_MEM|SANE_STATUS_ACCESS_DENIED [Default] Select the return-value of sane_read(). "Default" is the normal handling for scanning. All other status codes are for testing how the frontend handles them. --ppl-loss 0..128pel (in steps of 1) [0] The number of pixels that are wasted at the end of each line. --fuzzy-parameters[=(yes|no)] [no] Return fuzzy lines and bytes per line when sane_parameters() is called before sane_start(). --non-blocking[=(yes|no)] [no] Use non-blocking IO for sane_read() if supported by the frontend. --select-fd[=(yes|no)] [no] Offer a select filedescriptor for detecting if sane_read() will return data. --enable-test-options[=(yes|no)] [no] Enable various test options. This is for testing the ability of frontends to view and modify all the different SANE option types. --print-options Print a list of all options. Geometry: -l 0..200mm (in steps of 1) [0] Top-left x position of scan area. -t 0..200mm (in steps of 1) [0] Top-left y position of scan area. -x 0..200mm (in steps of 1) [80] Width of scan-area. -y 0..200mm (in steps of 1) [100] Height of scan-area. Bool test options: --bool-soft-select-soft-detect[=(yes|no)] [inactive] (1/6) Bool test option that has soft select and soft detect (and advanced) capabilities. That's just a normal bool option. --bool-soft-select-soft-detect-emulated[=(yes|no)] [inactive] (5/6) Bool test option that has soft select, soft detect, and emulated (and advanced) capabilities. --bool-soft-select-soft-detect-auto[=(auto|yes|no)] [inactive] (6/6) Bool test option that has soft select, soft detect, and automatic (and advanced) capabilities. This option can be automatically set by the backend. Int test options: --int[inactive] (1/7) Int test option with no unit and no constraint set. --int-constraint-range 4..192pel (in steps of 2) [inactive] (2/7) Int test option with unit pixel and constraint range set. Minimum is 4, maximum 192, and quant is 2. --int-constraint-word-list -42|-8|0|17|42|256|65536|16777216|1073741824bit [inactive] (3/7) Int test option with unit bits and constraint word list set. --int-constraint-array ,... [inactive] (4/7) Int test option with unit mm and using an array without constraints. --int-constraint-array-constraint-range 4..192dpi,... (in steps of 2) [inactive] (5/7) Int test option with unit dpi and using an array with a range constraint. Minimum is 4, maximum 192, and quant is 2. --int-constraint-array-constraint-word-list -42|-8|0|17|42|256|65536|16777216|1073741824%,... [inactive] (6/7) Int test option with unit percent and using an array with a word list constraint. --int-inexact [inactive] (7/7) Int test option that modifies the value and returns SANE_INFO_INEXACT. --red-gamma-table 0..255,... (in steps of 1) [advanced] Gamma-correction table for the red band. --green-gamma-table 0..255,... (in steps of 1) [advanced] Gamma-correction table for the green band. --blue-gamma-table 0..255,... (in steps of 1) [advanced] Gamma-correction table for the blue band. --gamma-table 0..255,... (in steps of 1) [advanced] Gamma-correction table. In color mode this option equally affects the red, green, and blue channels simultaneously (i.e., it is an intensity gamma table). Fixed test options: --fixed [inactive] (1/3) Fixed test option with no unit and no constraint set. --fixed-constraint-range -42.17..32768us (in steps of 2) [inactive] (2/3) Fixed test option with unit microsecond and constraint range set. Minimum is -42.17, maximum 32767.9999, and quant is 2.0. --fixed-constraint-word-list -32.7|12.1|42|129.5 [inactive] (3/3) Fixed test option with no unit and constraint word list set. String test options: --string [inactive] (1/3) String test option without constraint. --string-constraint-string-list First entry|Second entry|This is the very long third entry. Maybe the frontend has an idea how to display it [inactive] (2/3) String test option with string list constraint. --string-constraint-long-string-list First entry|Second entry|3|4|5|6|7|8|9|10|11|12|13|14|15|16|17|18|19|20|21|22|23|24|25|26|27|28|29|30|31|32|33|34|35|36|37|38|39|40|41|42|43|44|45|46 [inactive] (3/3) String test option with string list constraint. Contains some more entries... Button test options: --button [inactive] (1/1) Button test option. Prints some text... Type ``scanimage --help -d DEVICE'' to get list of all options for DEVICE. List of available devices: test:0 test:1
Daar deze opdracht op het einde opnieuw alle beschikbare scanners opspoort, moet je geduld oefenen.
Je kunt bijvoorbeeld de testafbeelding veranderen in een kleurenafbeelding en een minder exotisch bestandsformaat gebruiken met de volgende opdracht:
dany@pindabook:~$ scanimage -d test --test-picture Color --mode Color --format png > test.png
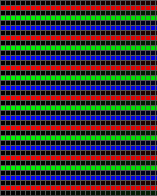
Dit kan Gwenview wel openen.
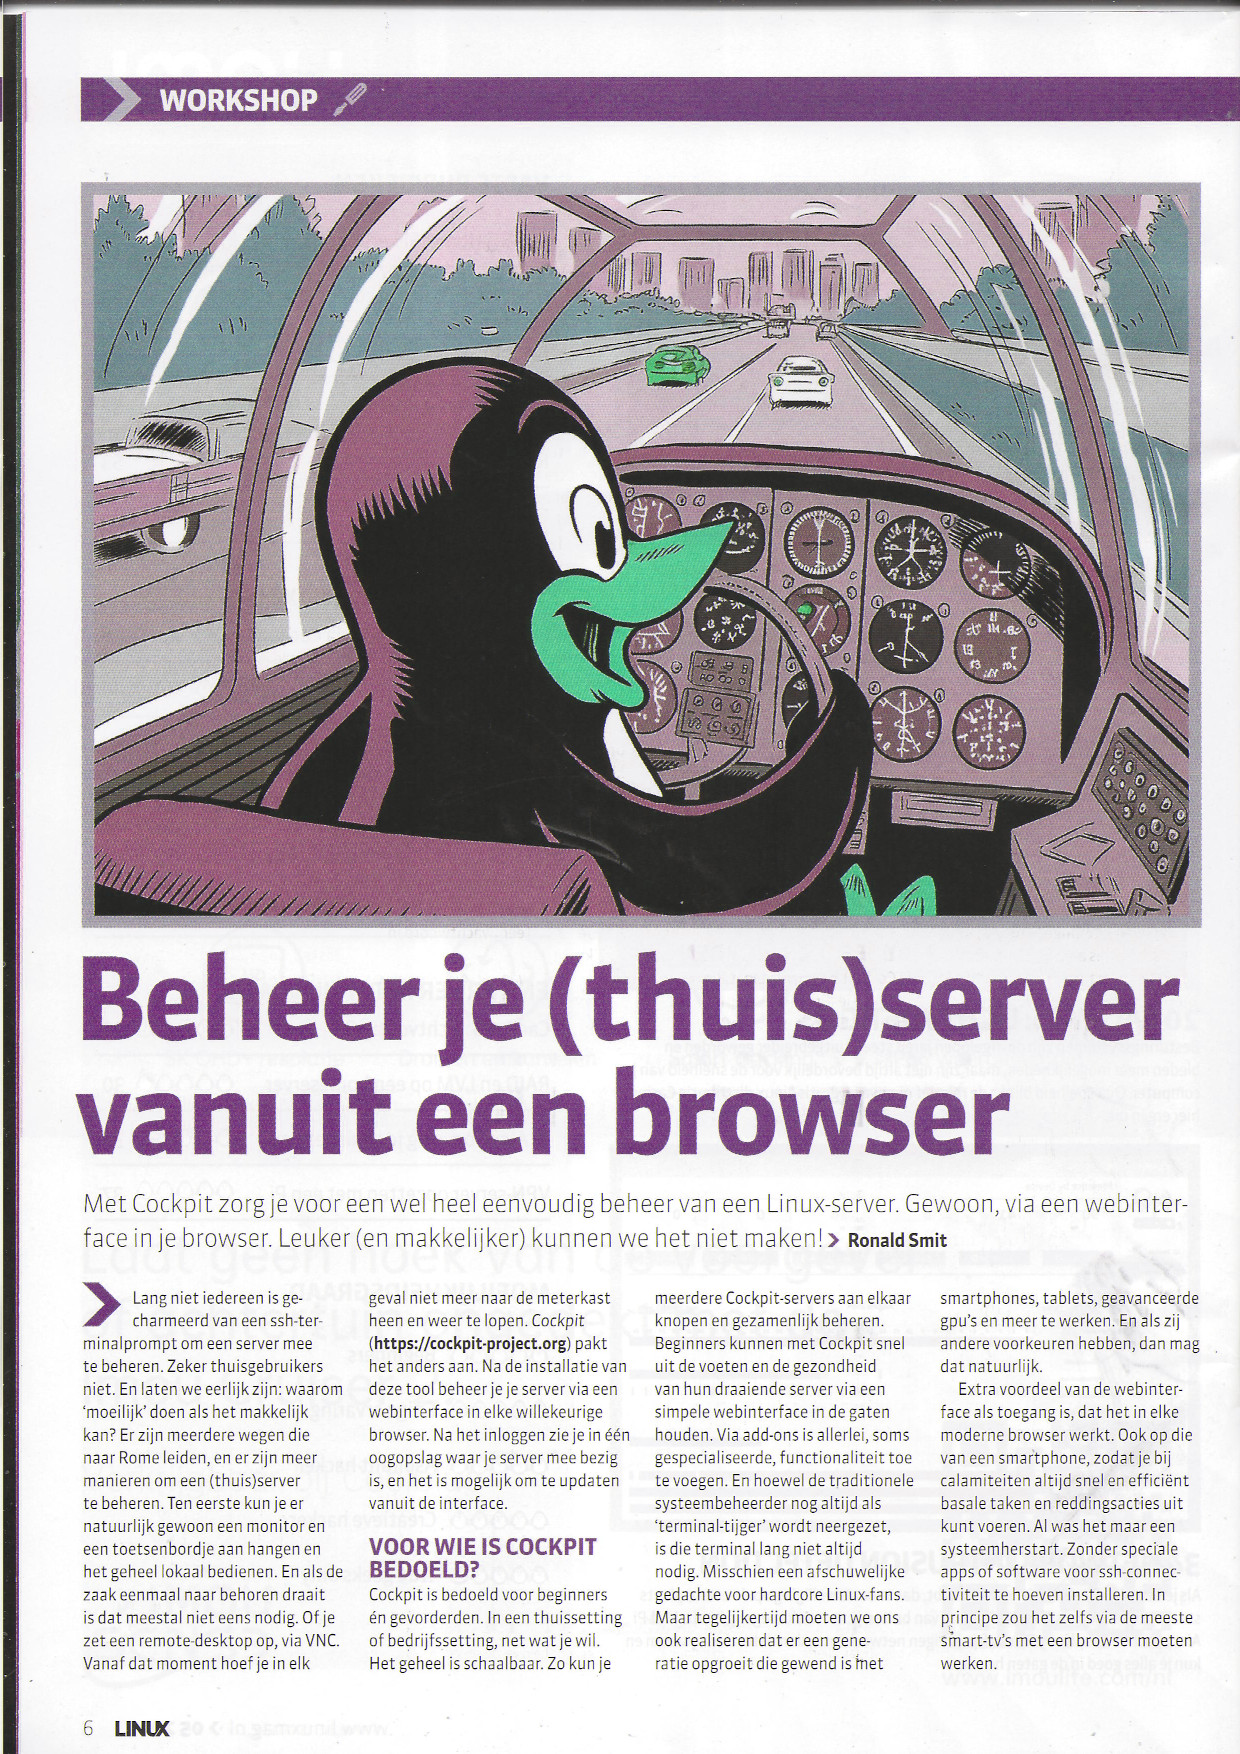
Afbeeldingen als bron voor een virtuele scanner gebruiken
PNM wordt vaak gebruikt als het standaard formaat voor SANE stuurprogramma's. Als je een JPEG-, PNG-, TIFF afbeelding (edm.) hebt, kun je die converteren naar PNM met ImageMagick:
dany@pindabook:~$ convert bron.tiff bron.pnm
Een virtuele PNM scanner activeer je zoals daarstraks met:
dany@pindabook:~$ sudo nano /etc/sane.d/dll.conf
Verwijder het commentaarteken voor de regel
#pnmDeze wordt dan
pnm
Sla de aanpassing op met Ctrl+o, gevolgt door Enter. Daarna verlaat je de nano editor met Ctrl+x.
De opties van de nieuwe virtuele PNM scanner kan je opvragen met:
dany@pindabook:~$scanimage -d pnm --helpUsage: scanimage [OPTION]... Start image acquisition on a scanner device and write image data to standard output. Parameters are separated by a blank from single-character options (e.g. -d epson) and by a "=" from multi-character options (e.g. --device-name=epson). -d, --device-name=DEVICE use a given scanner device (e.g. hp:/dev/scanner) --format=pnm|tiff|png|jpeg|pdf file format of output file ... -v, --verbose give even more status messages -B, --buffer-size=# change input buffer size (in kB, default 32) -V, --version print version information Output format is not set, using pnm as a default. Options specific to device `pnm': Source Selection: --filename[/tmp/input.ppm] The filename of the image to be loaded. --resolution auto||75|90|100|120|135|150|165|180|195|200|210|225|240|255|270|285|300dpi [75] Sets the resolution of the scanned image. Image Enhancement: --brightness -100..100% [0] Controls the brightness of the acquired image. --contrast -100..100% [0] Controls the contrast of the acquired image. --grayify[=(yes|no)] [no] Load the image as grayscale. --three-pass[=(yes|no)] [no] Simulate a three-pass scanner by returning 3 separate frames. For kicks, it returns green, then blue, then red. --hand-scanner[=(yes|no)] [no] Simulate a hand-scanner. Hand-scanners often do not know the image height a priori. Instead, they return a height of -1. Setting this option allows one to test whether a frontend can handle this correctly. --default-enhancements Set default values for enhancement controls (brightness & contrast). Gamma Tables: --custom-gamma[=(yes|no)] [no] Determines whether a builtin or a custom gamma-table should be used. --gamma-table 0..255,... [inactive] Gamma-correction table. In color mode this option equally affects the red, green, and blue channels simultaneously (i.e., it is an intensity gamma table). --red-gamma-table 0..255,... [inactive] Gamma-correction table for the red band. --green-gamma-table 0..255,... [inactive] Gamma-correction table for the green band. --blue-gamma-table 0..255,... [inactive] Gamma-correction table for the blue band. Status Code Simulation: --status[=(yes|no)] [yes] Do not force the backend to return a status code. --status-eof[=(yes|no)] [no] Force the backend to return the status code SANE_STATUS_EOF after sane_read() has been called. --status-jammed[=(yes|no)] [no] Force the backend to return the status code SANE_STATUS_JAMMED after sane_read() has been called. --status-nodocs[=(yes|no)] [no] Force the backend to return the status code SANE_STATUS_NO_DOCS after sane_read() has been called. --status-coveropen[=(yes|no)] [no] Force the backend to return the status code SANE_STATUS_COVER_OPEN after sane_read() has been called. --status-ioerror[=(yes|no)] [no] Force the backend to return the status code SANE_STATUS_IO_ERROR after sane_read() has been called. --status-nomem[=(yes|no)] [no] Force the backend to return the status code SANE_STATUS_NO_MEM after sane_read() has been called. --status-accessdenied[=(yes|no)] [no] Force the backend to return the status code SANE_STATUS_ACCESS_DENIED after sane_read() has been called. Type ``scanimage --help -d DEVICE'' to get list of all options for DEVICE. List of available devices: test:0 test:1 pnm:0 pnm:1
Daaruit kan je afleiden dat je een scan kunt maken van de klaargemaakte bron.pnm afbeelding met:
dany@pindabook:~$ scanimage -d pnm --filename /home/dany/bron.pnm --format jpeg > test.jpg
XSane test
Laten we onze virtuele scanner ook eens testen met een grafisch programma, zoals XSane. XSane installeer je met de opdracht:
dany@pindabook:~$ sudo apt install xsane
[sudo] wachtwoord voor root:
Pakketlijsten worden ingelezen... Klaar
Boom van vereisten wordt opgebouwd... Klaar
De statusinformatie wordt gelezen... Klaar
De volgende extra pakketten zullen geïnstalleerd worden:
  xsane-common
Voorgestelde pakketten:
  gocr | cuneiform | tesseract-ocr | ocrad gv hylafax-client | mgetty-fax
De volgende NIEUWE pakketten zullen geïnstalleerd worden:
  xsane xsane-common
0 opgewaardeerd, 2 nieuw geïnstalleerd, 0 te verwijderen en 0 niet opgewaardeerd.
Er moeten 1.941 kB aan archieven opgehaald worden.
Na deze bewerking zal er 8.040 kB extra schijfruimte gebruikt worden.
Wilt u doorgaan? [J/n]
Ophalen:1 http://deb.debian.org/debian bookworm/main amd64 xsane-common all 0.999-12.1~deb12u1 [1.416 kB]
Ophalen:2 http://deb.debian.org/debian bookworm/main amd64 xsane amd64 0.999-12.1~deb12u1 [524 kB]
1.941 kB opgehaald in 15s (131 kB/s)
Voorheen niet geselecteerd pakket xsane-common wordt geselecteerd.
(Database wordt ingelezen ... 183809 bestanden en mappen momenteel geïnstalleerd.)
Uitpakken van .../xsane-common_0.999-12.1~deb12u1_all.deb wordt voorbereid...
Bezig met uitpakken van xsane-common (0.999-12.1~deb12u1) ...
Voorheen niet geselecteerd pakket xsane wordt geselecteerd.
Uitpakken van .../xsane_0.999-12.1~deb12u1_amd64.deb wordt voorbereid...
Bezig met uitpakken van xsane (0.999-12.1~deb12u1) ...
Instellen van xsane-common (0.999-12.1~deb12u1) ...
Instellen van xsane (0.999-12.1~deb12u1) ...
Bezig met afhandelen van triggers voor hicolor-icon-theme (0.17-2) ...
Bezig met afhandelen van triggers voor man-db (2.11.2-2) ...
Bezig met afhandelen van triggers voor mailcap (3.70+nmu1) ...
Bezig met afhandelen van triggers voor desktop-file-utils (0.26-1) ...
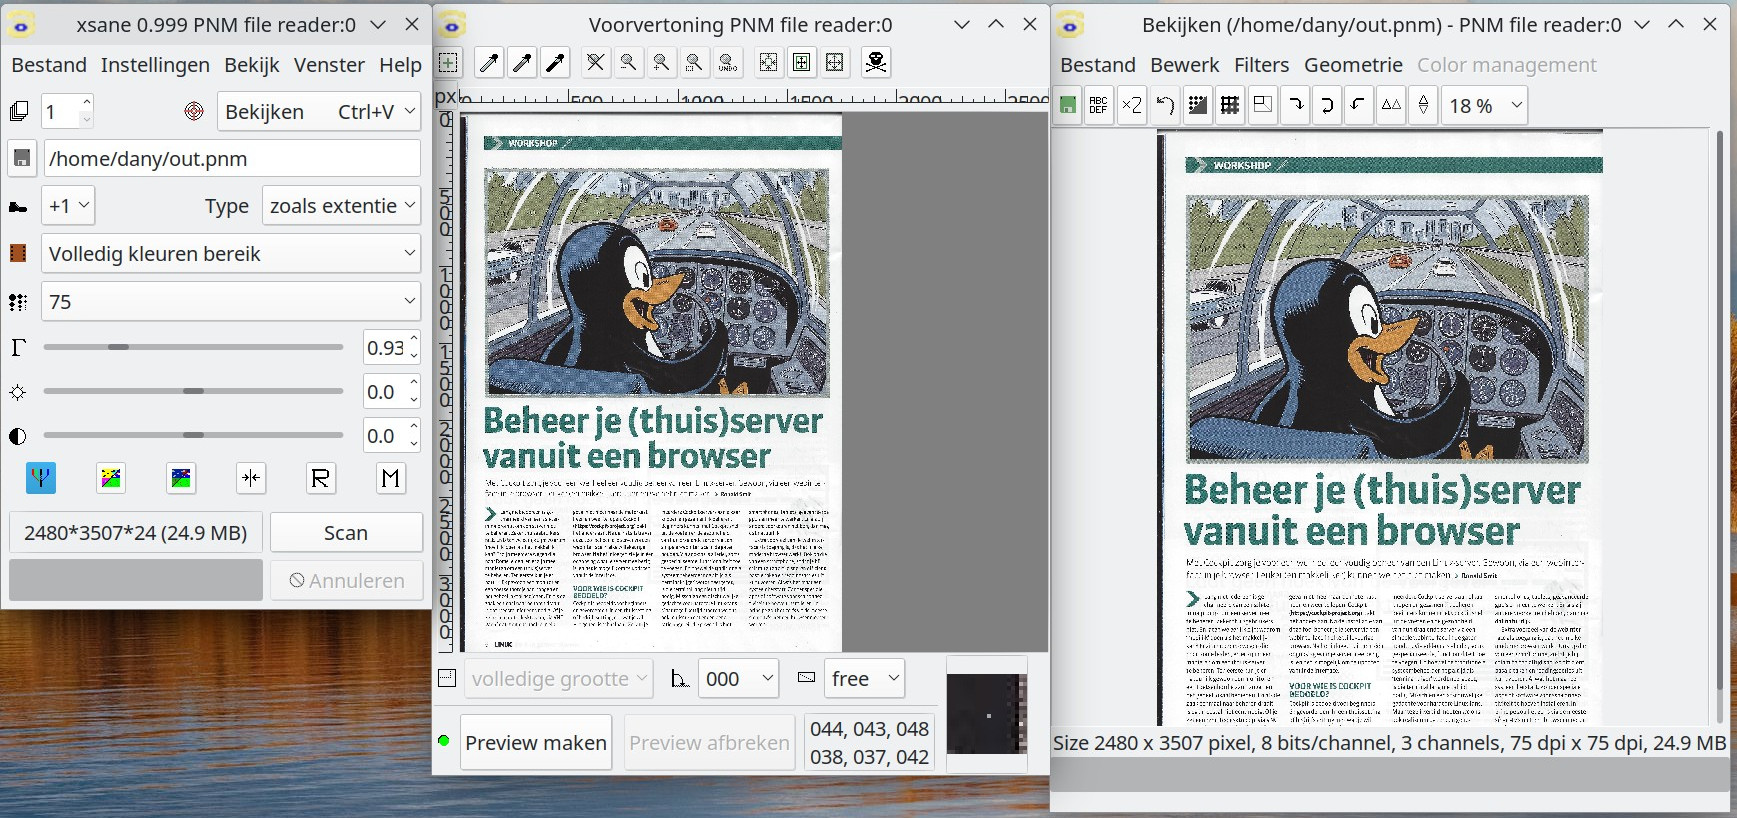
Bij het starten verschijnt na een tijdje de verschillende actieve scanners, waaronder de virtuele:
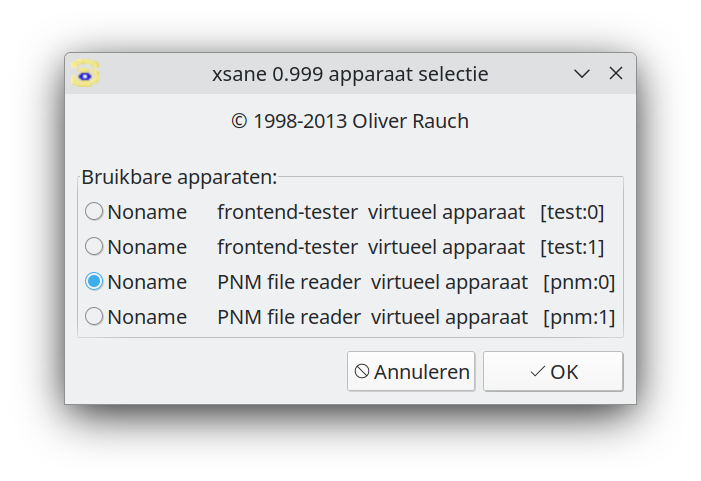
Selecteer een PNM file reader virtueel apparaat en klik op de knop .
Waarschijnlijk verschijnt automatisch (verborgen achter een ander venster) het venster Standaard opties PNM file reader:0. Je kunt dit venster ook oproepen via het menu Venster en het selectievakje Laat standaard opties zien.
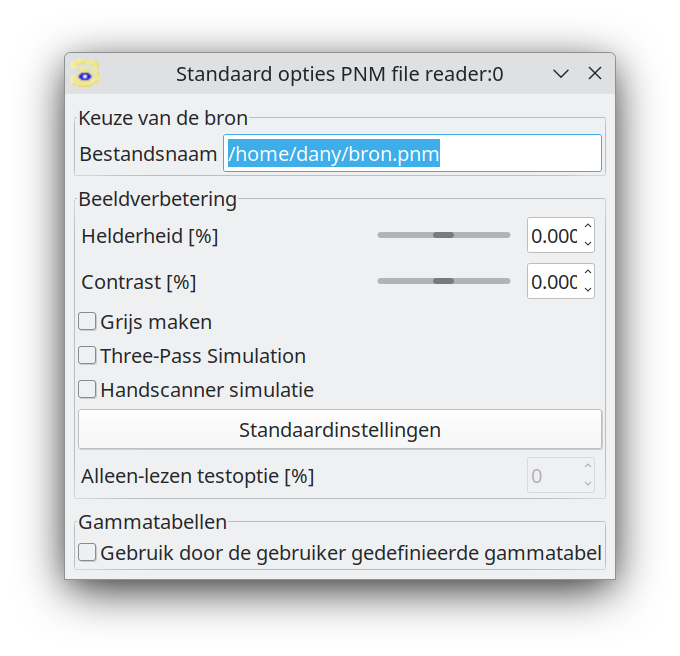
Je kunt nu kiezen tussen het aanpassen van het tekstvak Bestandsnaam of je kopieert (verplaatst) het bron.pnm bestand naar /tmp/input.ppm (de standaard afbeeldingsnaam van de virtuele PNM scanner). Deze laatste werkwijze is de meest betrouwbare en werkt bij alle grafische scanner programma's. In XSane werkt ook het aanpassen van de bestandsnaam. Zorg dat alle andere instellingen staan zoals in de afbeelding hierboven en sluit dit venster.
De bron afbeelding bron.pnm kan je kopiëren naar de standaard afbeeldingsnaam met de opdracht:
dany@pindabook:~$ cp bron.pnm /tmp/input.ppm
Na het maken van een voorvertoning (knop ) kan je een virtuele scan maken (knop )
Opruimen
- Zorg dat XSane afgesloten is.
- Verwijder XSane met de opdracht:
dany@pindabook:~$
sudo apt purge xsane[sudo] wachtwoord voor root: Pakketlijsten worden ingelezen... Klaar Boom van vereisten wordt opgebouwd... Klaar De statusinformatie wordt gelezen... Klaar Het volgende pakket is automatisch geïnstalleerd en is niet langer nodig: xsane-common Gebruik 'sudo apt autoremove' om het te verwijderen. De volgende pakketten zullen VERWIJDERD worden: xsane* 0 opgewaardeerd, 0 nieuw geïnstalleerd, 1 te verwijderen en 0 niet opgewaardeerd. Na deze bewerking zal er 2.394 kB schijfruimte vrijkomen. Wilt u doorgaan? [J/n] (Database wordt ingelezen ... 174063 bestanden en mappen momenteel geïnstalleerd.) xsane (0.999-12.1~deb12u1) wordt verwijderd ... Bezig met afhandelen van triggers voor hicolor-icon-theme (0.17-2) ... Bezig met afhandelen van triggers voor man-db (2.11.2-2) ... Bezig met afhandelen van triggers voor mailcap (3.70+nmu1) ... Bezig met afhandelen van triggers voor desktop-file-utils (0.26-1) ... - Om ook de niet meer gebruikte afhankelijke pakketten te verwijderen, voer je de volgende opdracht uit:
dany@pindabook:~$
sudo apt autoremovePakketlijsten worden ingelezen... Klaar Boom van vereisten wordt opgebouwd... Klaar De statusinformatie wordt gelezen... Klaar De volgende pakketten zullen VERWIJDERD worden: xsane-common 0 opgewaardeerd, 0 nieuw geïnstalleerd, 1 te verwijderen en 0 niet opgewaardeerd. Na deze bewerking zal er 5.646 kB schijfruimte vrijkomen. Wilt u doorgaan? [J/n] (Database wordt ingelezen ... 174034 bestanden en mappen momenteel geïnstalleerd.) xsane-common (0.999-12.1~deb12u1) wordt verwijderd ... - De configuratie- en werkmap van XSane verwijder je met:
dany@pindabook:~$
rm -r .sane/xsane/ - Deactiveer de virtuele scanners door in het configuratie bestand:
dany@pindabook:~$
Plaats voor de volgende regels:sudo nano /etc/sane.d/dll.conftest pnm
een commentaar teken om ze te deactiveren:#test #pnm
Sla de aanpassing op met Ctrl+o, gevolgt door Enter. Daarna verlaat je de nano editor met Ctrl+x. - Verwijder de aangemaakte test afbeeldingen en scanresultaten:
dany@pindabook:~$
rm bron.pnm bron.tiff test.jpg